If you’re using a paid or free applicant tracking system to help you with your company’s hiring, you’re already probably invested in further streamlining your company’s hiring process.
One of the easiest and best ways you can begin to do this is by integrating your website’s careers page with your ATS, so that you can start tracking every candidate that applies through that source.
Now, even though Rooster already offers a few options to help you integrate with us (like our Direct URL integration and custom HTML code embed) – we wanted to help make it even easier for websites built on WordPress to integrate with our ATS.
This blog is dedicated to helping you carry out this task step-by-step. So, let’s hop right on to it!
Step 01: Download the plugin
This step is pretty self-explanatory. All you need to do is download the plugin here.
Step 02: Add the plugin to your WordPress website
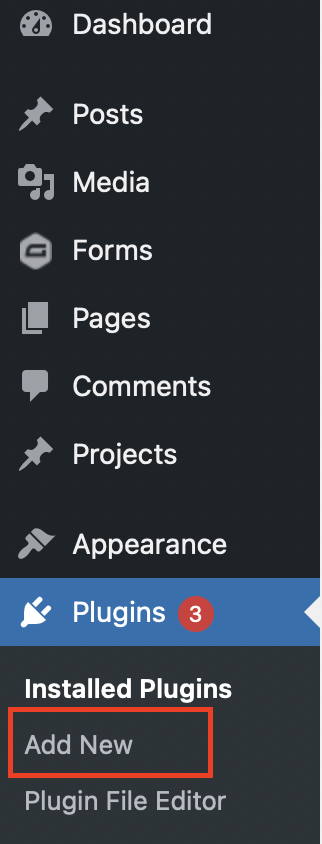
Head over to your WordPress admin panel and click on “Plugins” in the sidebar menu. Then, click the “Add New” button.

Step 03: Upload your plugin
Click on the “Upload Plugin” button and select the Rooster plugin file from your computer.

After that, click “Install Now.”

Step 04: Activate the plugin
Once the plugin has been uploaded, click on “Activate plugin”. This will install the plugin to your WordPress account.

Step 05: Add some finishing touches to your plugin
Once the plugin has been installed, a new shortcode called
will be introduced to your WordPress account.All you need to do is copy the below code to a shortcode block in the WordPress ‘Gutenberg’ editor, or to your favorite page builder to display your job listing. Then, replace the ‘YOUR_COMPANY_ID’ with your unique company ID.

If you are not happy with the default style of the job listing, you can pass an optional attribute to the shortcode to inject a class to be used as a selector for custom styling.
And, there you go! You’ve now integrated your careers page with the Rooster ATS.


0 Comments