
Rooster’s ‘Tasks’ feature can help you create and assign tasks on an individual candidate level within the ATS, so that you and your team can keep a track of and execute everything that needs to be done to make a successful hire.
Let’s take a look at how you can create your first task.
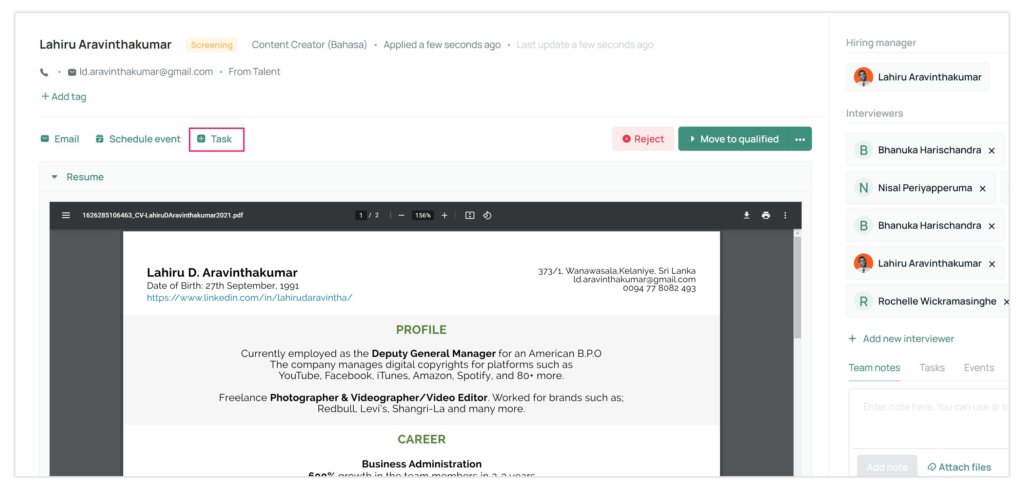
Step 01: Open your candidate profile
Click on your job and then locate your candidate. Once you do, click on the candidate to view their profile.
Step 02: Click on ‘+ Task’
Once you’ve opened up the candidate profile, click on ‘+ Task’ to begin.
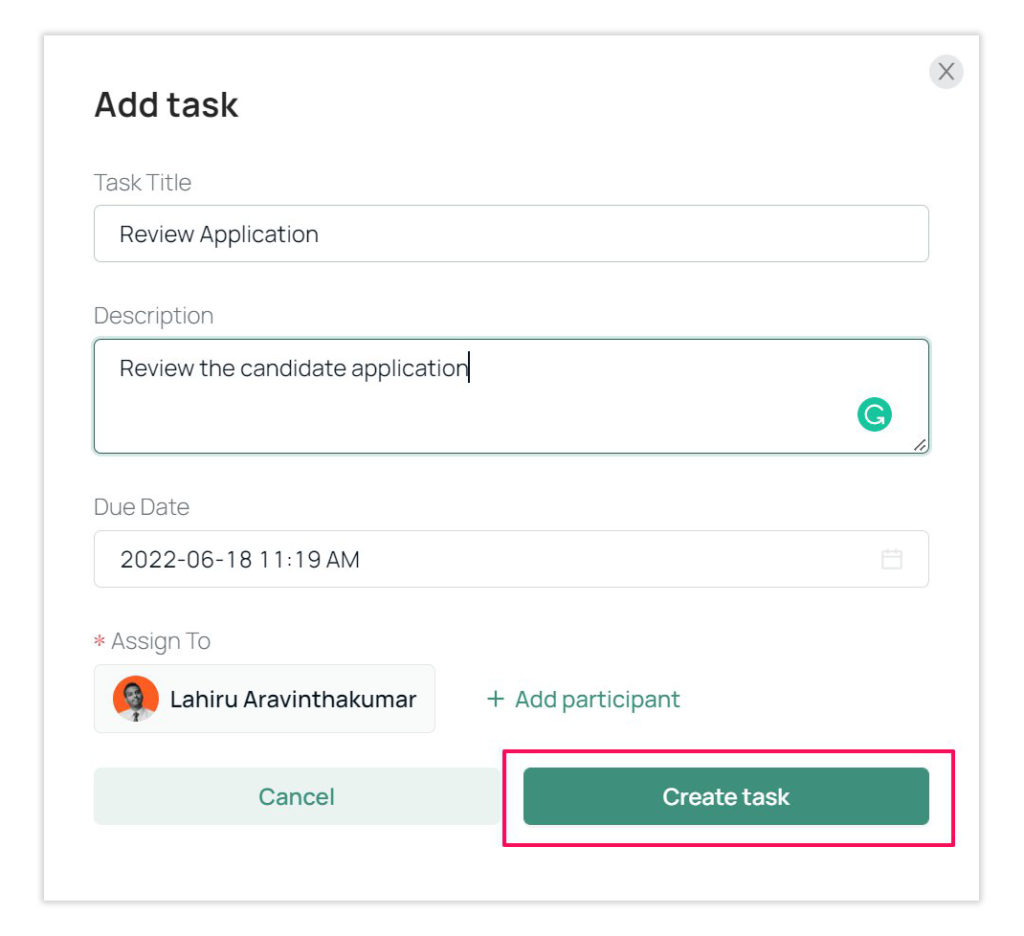
Step 03: Set up your task
- Add a title to your task. Make sure it’s clear and concise so you and the assignees can understand the task at first glance.
- Add a description to your task. This is optional, but it might help your assignees understand the task more clearly.
- Set a due date for the task.
- Assign the task to the right person. Before you do, make sure your assignees have been assigned as either a Hiring Manager or Interviewer to the job.
Step 04: Finalise the task
When you’ve finished adding all the necessary information, do a quick double take to verify everything and click on ‘Create Event’.
You should now be able to view your tasks either under the ‘Tasks’ section of the specific candidate’s profile or under the task icon on your Rooster navigation bar.
 Facebook
 LinkedIn
 Twitter


0 Comments