
Are you tired of the back-and-forth emails and approval processes that slow your hiring efforts?
Introducing our new Job Requisition feature, designed to simplify and streamline your recruitment workflow.
In this step-by-step guide, we’ll walk you through everything you need to know to make the most of this powerful tool. From creating multiple job requisitions at once to tracking approvals in real time, our guide will help you transform your hiring process and attract top talent more efficiently than ever before.
Before creating job requisitions, ensuring your hiring team has all the necessary information at their fingertips is essential. That’s where our new Benefits Templates come in. These details are accessible only to your internal hiring team and are not visible to the public or job seekers.
The Job Requisition and Benefits Templates features are available exclusively to our premium customers.
Here’s how to set it up:
Setting up Benefits
Step 01: Set up the templates
Settings > Templates > Benefits
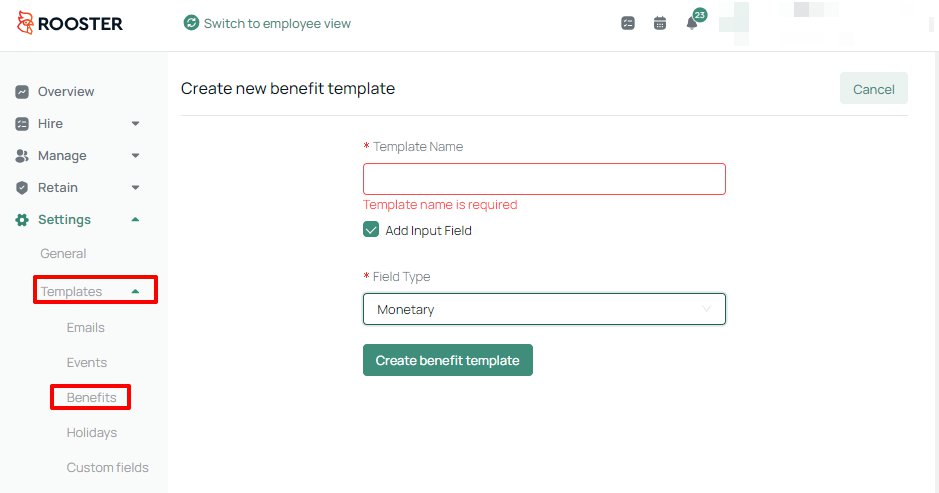
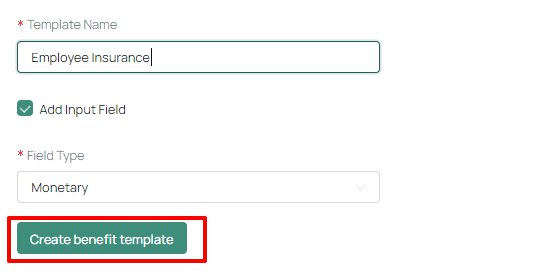
Step 02: Add benefit details
- Name your benefit type.
- You can select ‘Monetary’ or ‘Text ‘ as the field type. ‘Monetary’ type can be selected if you need to add a nominal value and ‘Text’ type can be chosen if you need to add a text explaining the benefit type.
- Once all the details are in place, click ‘Create benefit template’.
Once you have set up the benefit templates, you can go ahead and start setting up your job requisitions.
Setting up Job Requisitions
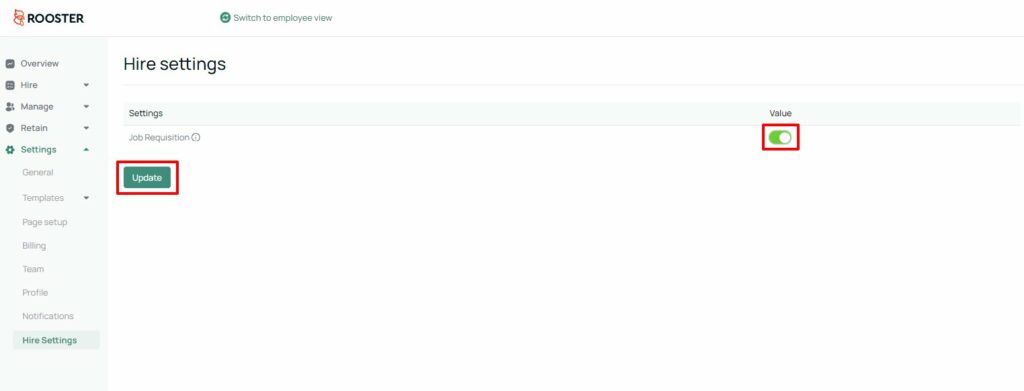
Step 01: Configure the settings
Settings > Hire Settings > Enable the ‘Job Requisition’ toggle > click ‘Update’.
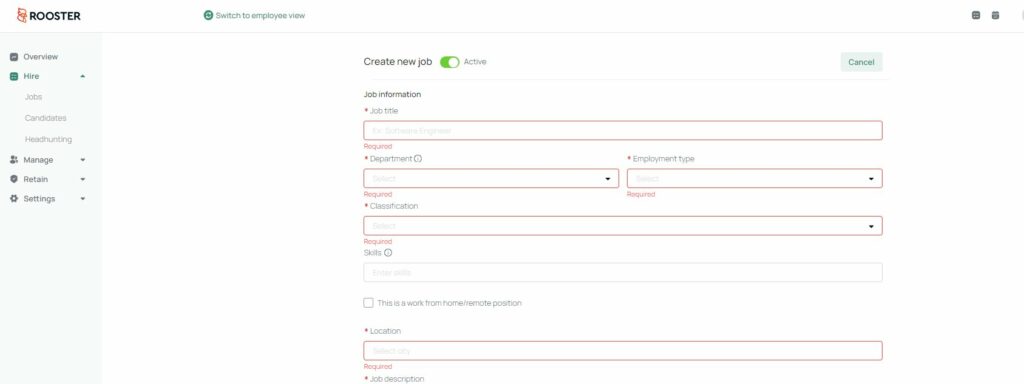
Step 02: Create your job post
Go to Hire > Jobs > Create New Jobs > Add the details > Create New Job
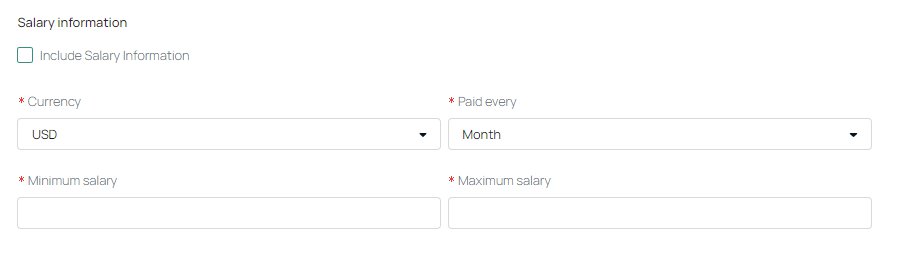
Adding salary details
If you need the salary details to be visible on your actual job post publicly, you need to tick on the ‘
Include Salary Information’ tickbox. You would still have to enter the salary details for reference of the internal hiring team even if you plan not to publish the information on the job post itself.
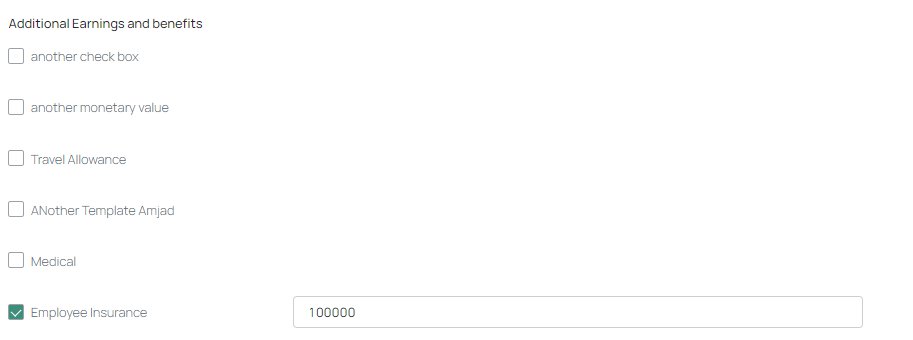
Adding benefits
You can select the benefits you just created from the Benefits Templates section under Settings. Tick the benefits that are applicable for the new job requisition and add the relevant details.
Adding the number of positions
Sometimes your company might have an opening for more than one position in the same role. For example, there can be multiple openings for the role of sales executive. Enter the number of actual open positions here.

Adding the type of requisition
The job post might be for a newly created role or you could be looking for a replacement. You need to specifically mention the requisition type here.

Add approvers
Finally, you need to add the approvers to the job post. Until the job post is approved by them, it won’t go live on the system.

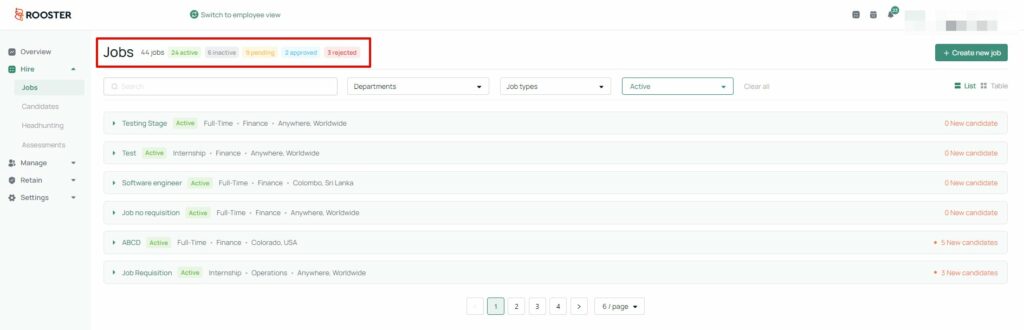
Job requisition approval stages on the ATS
When you go to Hire > Jobs, you can view the job requisitions with the below filters.
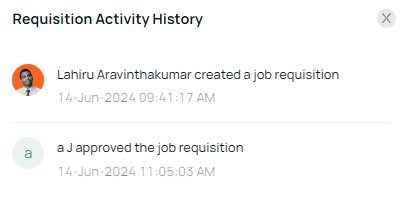
Check the activity log for a job requisition
Go to Hire > Jobs > Select the job > and click on this button.
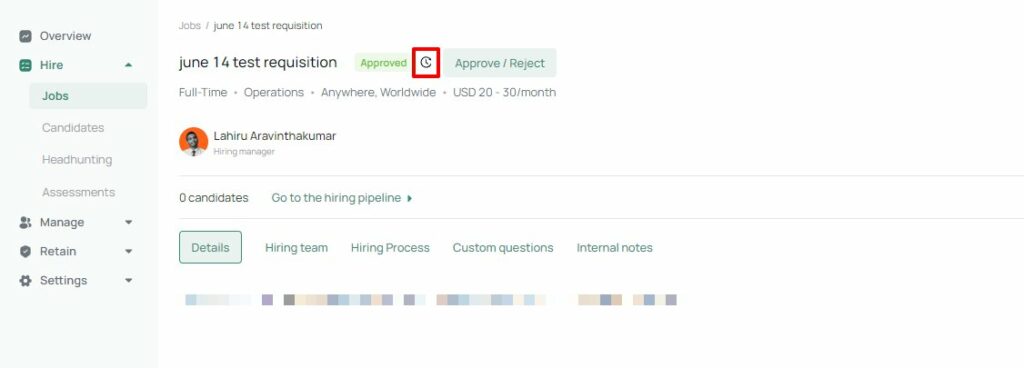
You can view the activity log here.
That’s how you can create job requisitions on Rooster ATS. If you have any questions or issues, don’t hesitate to reach out to us!
Happy Hiring!
 Facebook
 LinkedIn
 Twitter


 Free for Startups
0 Comments